Encapsulating the UI with ViewComponent + Storybook
Part 13 of building a Rails 7 application

I am a web developer who has been in the industry since 1995. My current tech stack preference is Ruby on Rails with JavaScript. Originally from Australia but now living in Scotland.
So far the user interface for my application has been built using a combination of views (including partial views) and helper methods.
An alternative exists called ViewComponent. This is a way of encapsulating a single user interface element into a reusable and testable Ruby class. It still uses an ERB template for specifying the HTML content.
This is a method I have not used before so will experiment with it for this application as based on the documentation it appears to be a superior method for rendering user interface content.
To get started I need to add the gem to my Gemfile:
# Encapsulate UI elements into a class
gem 'view_component'
I can then install it and use the gem's generator to create my first component:
% bundle install
% rails generate component UserProfile user
      create  app/components/user_profile_component.rb
      invoke  test_unit
      create    test/components/user_profile_component_test.rb
      invoke  tailwindcss
      create    app/components/user_profile_component.html.erb
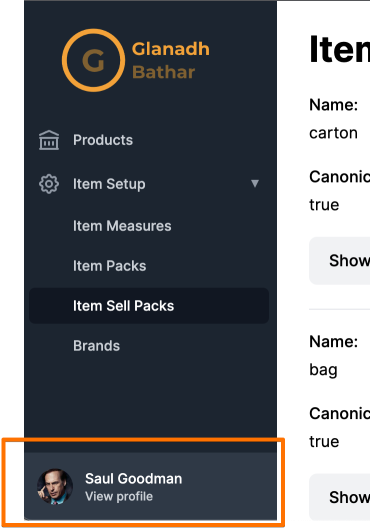
My initial component will be for the user profile section on the side navigation here:
Taking a look at the UserProfileComponent shows there isn't too much in there at the moment, and at this point there is nothing that needs to be added.
class UserProfileComponent < ViewComponent::Base
  def initialize(user:)
    super
    @user = user
  end
end
In the the HTML component is where I can put the erb for the component:
<div class="flex-shrink-0 flex bg-gray-700 p-4">
  <a href="#" class="flex-shrink-0 w-full group block">
    <div class="flex items-center">
      <div id="user_profile_image">
        <%= image_tag(gravatar_url, class: 'inline-block h-12 w-12 rounded-full', alt: "#{@user.full_name}") %>
      </div>
      <div class="ml-3">
        <p id="user_profile_name" class="text-sm font-medium text-white"><%= @user.full_name %></p>
        <p id="user_profile_view" class="text-xs font-medium text-gray-300 group-hover:text-gray-200">View profile</p>
      </div>
    </div>
  </a>
</div>
In this file I can refer to @user to retrieve any relevant information about the user that I want to display in this component.
There is no User class yet so I will need to add a temporary one for the moment:
# Temporary User model until authentication/authorization added
class User
  include ActiveModel::API

  attr_accessor :full_name, :email
end
This is simply an ActiveModel that has two attributes, the full_name and the email.
I also want to take advantage of Gravatar so I can add a method to the UserProfileComponent that will generate the correct Gravatar URL based on the user's email address. This keeps the User model clean and keeps everything related to this user profile component nicely together in a single class.
class UserProfileComponent < ViewComponent::Base
  def initialize(user:)
    super
    @user = user
  end

  def gravatar_url
    "https://www.gravatar.com/avatar/#{gravatar_hash}?d=retro"
  end

  private

  def gravatar_hash
    Digest::MD5.hexdigest(@user.email)
  end
end
Lastly I need to render the component into the side navigation:
<%= render(UserProfileComponent.new(user: User.new(full_name: 'Saul Goodman', email: 'saul.goodman@example.com'))) %>
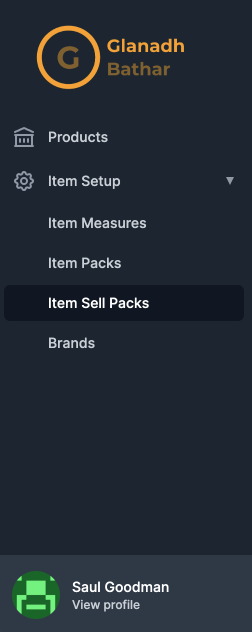
Reloading the page will now show the following for the user profile component on the side navigation. Since there is no Gravatar record for saul.goodman@example.com (unsurprisingly) a default image is returned. This was based on the d=retro parameter being passed in the gratavar_url method of UserProfileComponent.
Next there should be some tests added for this new component. The generator added an empty test for me so I just need to flesh it out:
require 'test_helper'

class UserProfileComponentTest < ViewComponent::TestCase
  def setup
    @user = build(:user, full_name: 'Saul Goodman', email: 'saul.goodman@example.com')
  end

  test 'renders full name' do
    assert_equal(
      %(<p id="user_profile_name" class="text-sm font-medium text-white">Saul Goodman</p>),
      render_inline(UserProfileComponent.new(user: @user)).css('#user_profile_name').to_html
    )
  end

  test 'renders gravatar image' do
    assert_equal(
      %(<img class="inline-block h-12 w-12 rounded-full" alt="Saul Goodman" src="https://www.gravatar.com/avatar/57595bd63983cd9dae1f8ffe9d286c52?d=retro">),
      render_inline(UserProfileComponent.new(user: @user)).css('#user_profile_image img').to_html
    )
  end
end
Now that the component is isolated in this way it is possible to use the tool Storybook to visualise it (and potentially test it). Follow the link to read more about how this is helpful in the development process, but basically it boils down to easier testing, documentation and visualisation of a user interface element without the need to bring up a full development stack to do so.
In order to use Storybook there is a gem I can install that will produce the correct content for Storybook to function.
Gemfile
gem "view_component_storybook"
Running the tool will produce json files for our components that I don't need to store in source control, so I can add that to the .gitignore:
**/*.stories.json
Require the gems in the config/application.rb:
require 'view_component'
require 'view_component/storybook'
Now over to some steps for installing Storybook:
yarn add @storybook/server @storybook/addon-controls --dev
Add an npm script to package.json:
{
  "scripts": {
    "storybook": "start-storybook"
  }
}
Configure Storybook to tell it where the components are in our code base by adding a .storybook/main.js:
module.exports = {
  stories: ["../test/components/**/*.stories.json"],
  addons: ["@storybook/addon-controls"],
};
Tell Storybook which URL in our Rails application to call to preview the components by adding a .storybook/preview.js:
export const parameters = {
  server: {
    url: `http://localhost:3000/rails/stories`,
  },
};
Now that installation is done I can create a basic story for the UserProfileComponent. I can create a stories directory underneath components then for each component add a corresponding story class:
user_profile_component_stories.rb
class UserProfileComponentStories < ViewComponent::Storybook::Stories
  story :saul_goodman do
    layout 'stories'
    constructor(user: User.new(full_name: 'Saul Goodman', email: 'saul.goodman@example.com'))
  end
end
I also need to add a different layout, one that does not try to render the rest of the user interface and only adds in the JavaScript and CSS needed.
app\views\layouts\stories.html.erb
<!DOCTYPE html>
<html>
  <%= render "application/head" %>
  <%= yield %>
</html>
There is one other problem that will need to be resolved, and that is CORS configuration. Because Storybook is running on a different port to the Rails application I need to allow this interaction to occur. I can add the rack-cors gem:
gem 'rack-cors'
And then add an initialiser to configure it:
config/initializers/cors.rb
Rails.application.config.middleware.insert_before 0, Rack::Cors do
  allow do
    origins '*'
    resource '*', headers: :any, methods: %i[get post]
  end
end
Now I can generate the story json:
rake view_component_storybook:write_stories_json
And finally I can launch Storybook to view the result:
yarn storybook
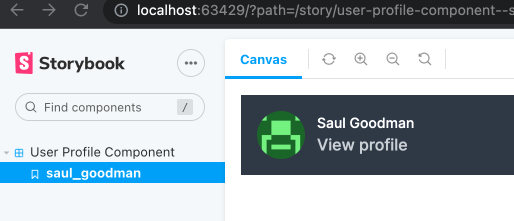
This will open a new browser window where I can view the various stories I have created for my components, so far only the one:
Useful links:
https://viewcomponent.org/
https://jonspalmer.github.io/view_component_storybook/guide/getting-started.html
https://en.gravatar.com/site/implement/images/ruby/
https://en.gravatar.com/site/implement/images/
https://storybook.js.org/
https://www.stackhawk.com/blog/rails-cors-guide/


